
By Valentina
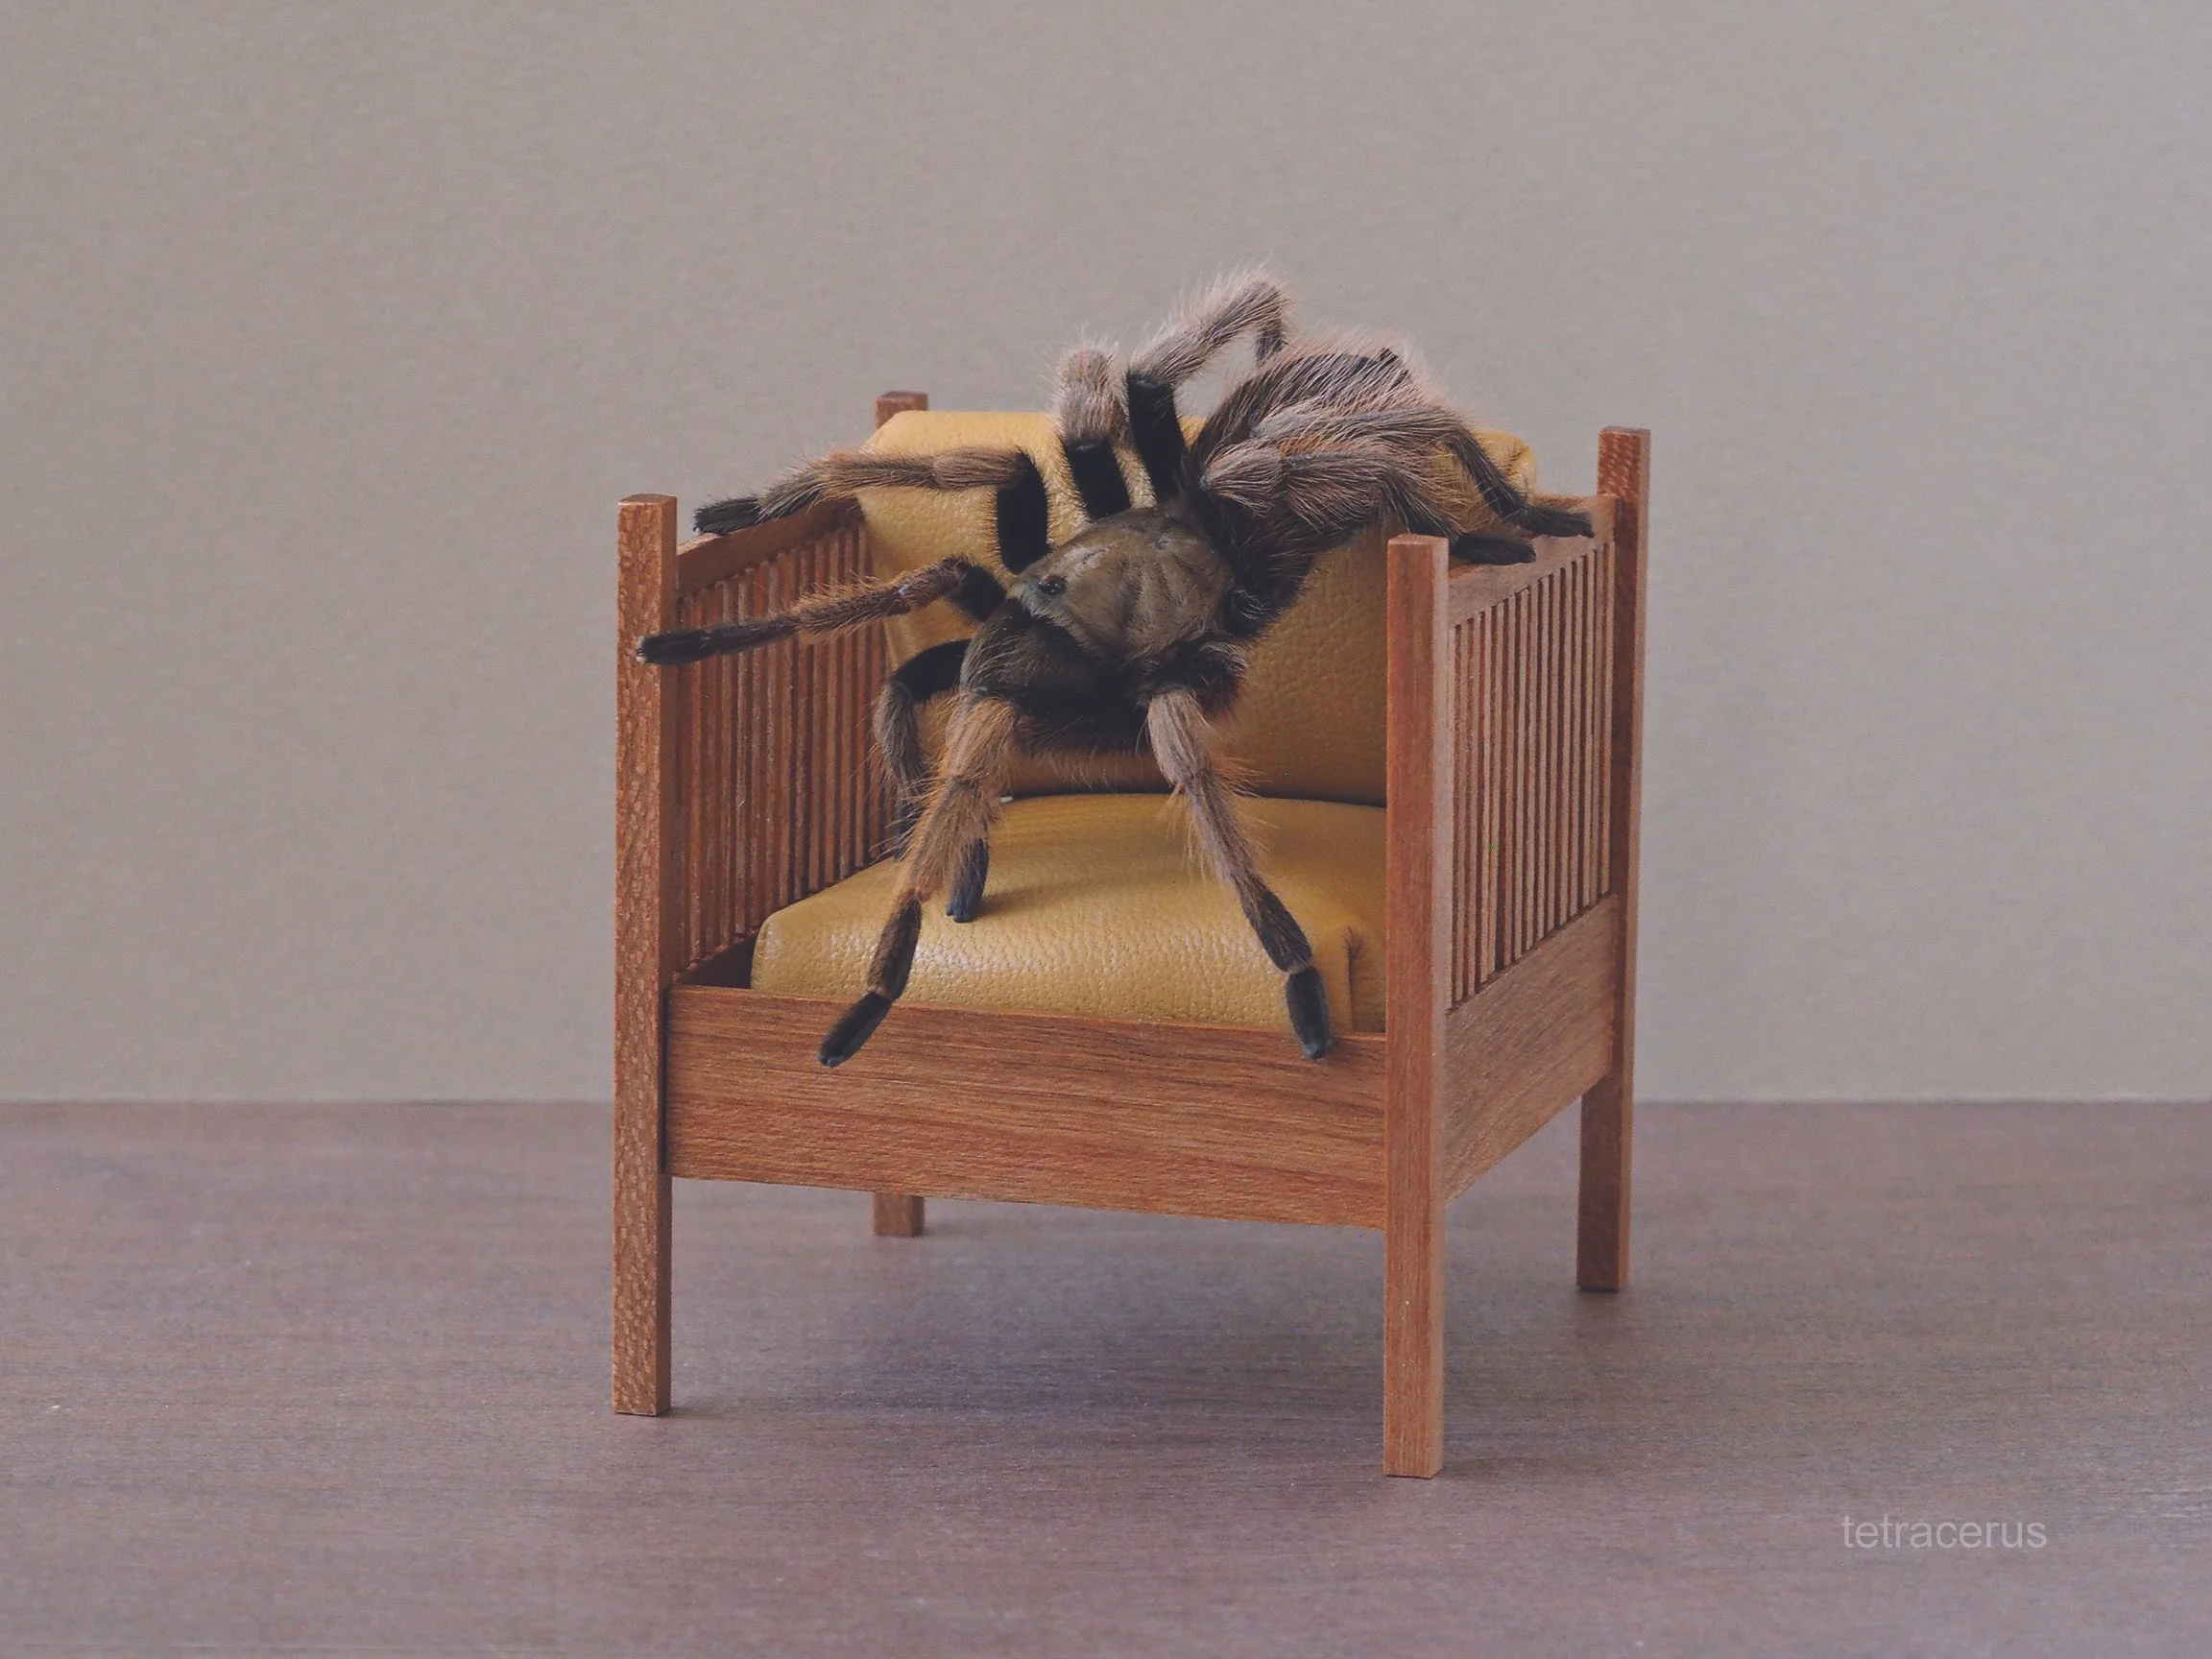
Heavy wooden furniture is not my usual cup of tea but I wanted to recreate a personal favourite in miniature. Gustav Stickley was a key name in the Arts & Crafts era and namesake of this design classic. I set out to recreate this boxy armchair in a 1:12 scale, a tribute to an iconic and often revisited era of design. This tutorial for a 1:12 scale model of Stickley’s spindle cube chair is based on measurements I made of an early 2000s reissue of the original design.
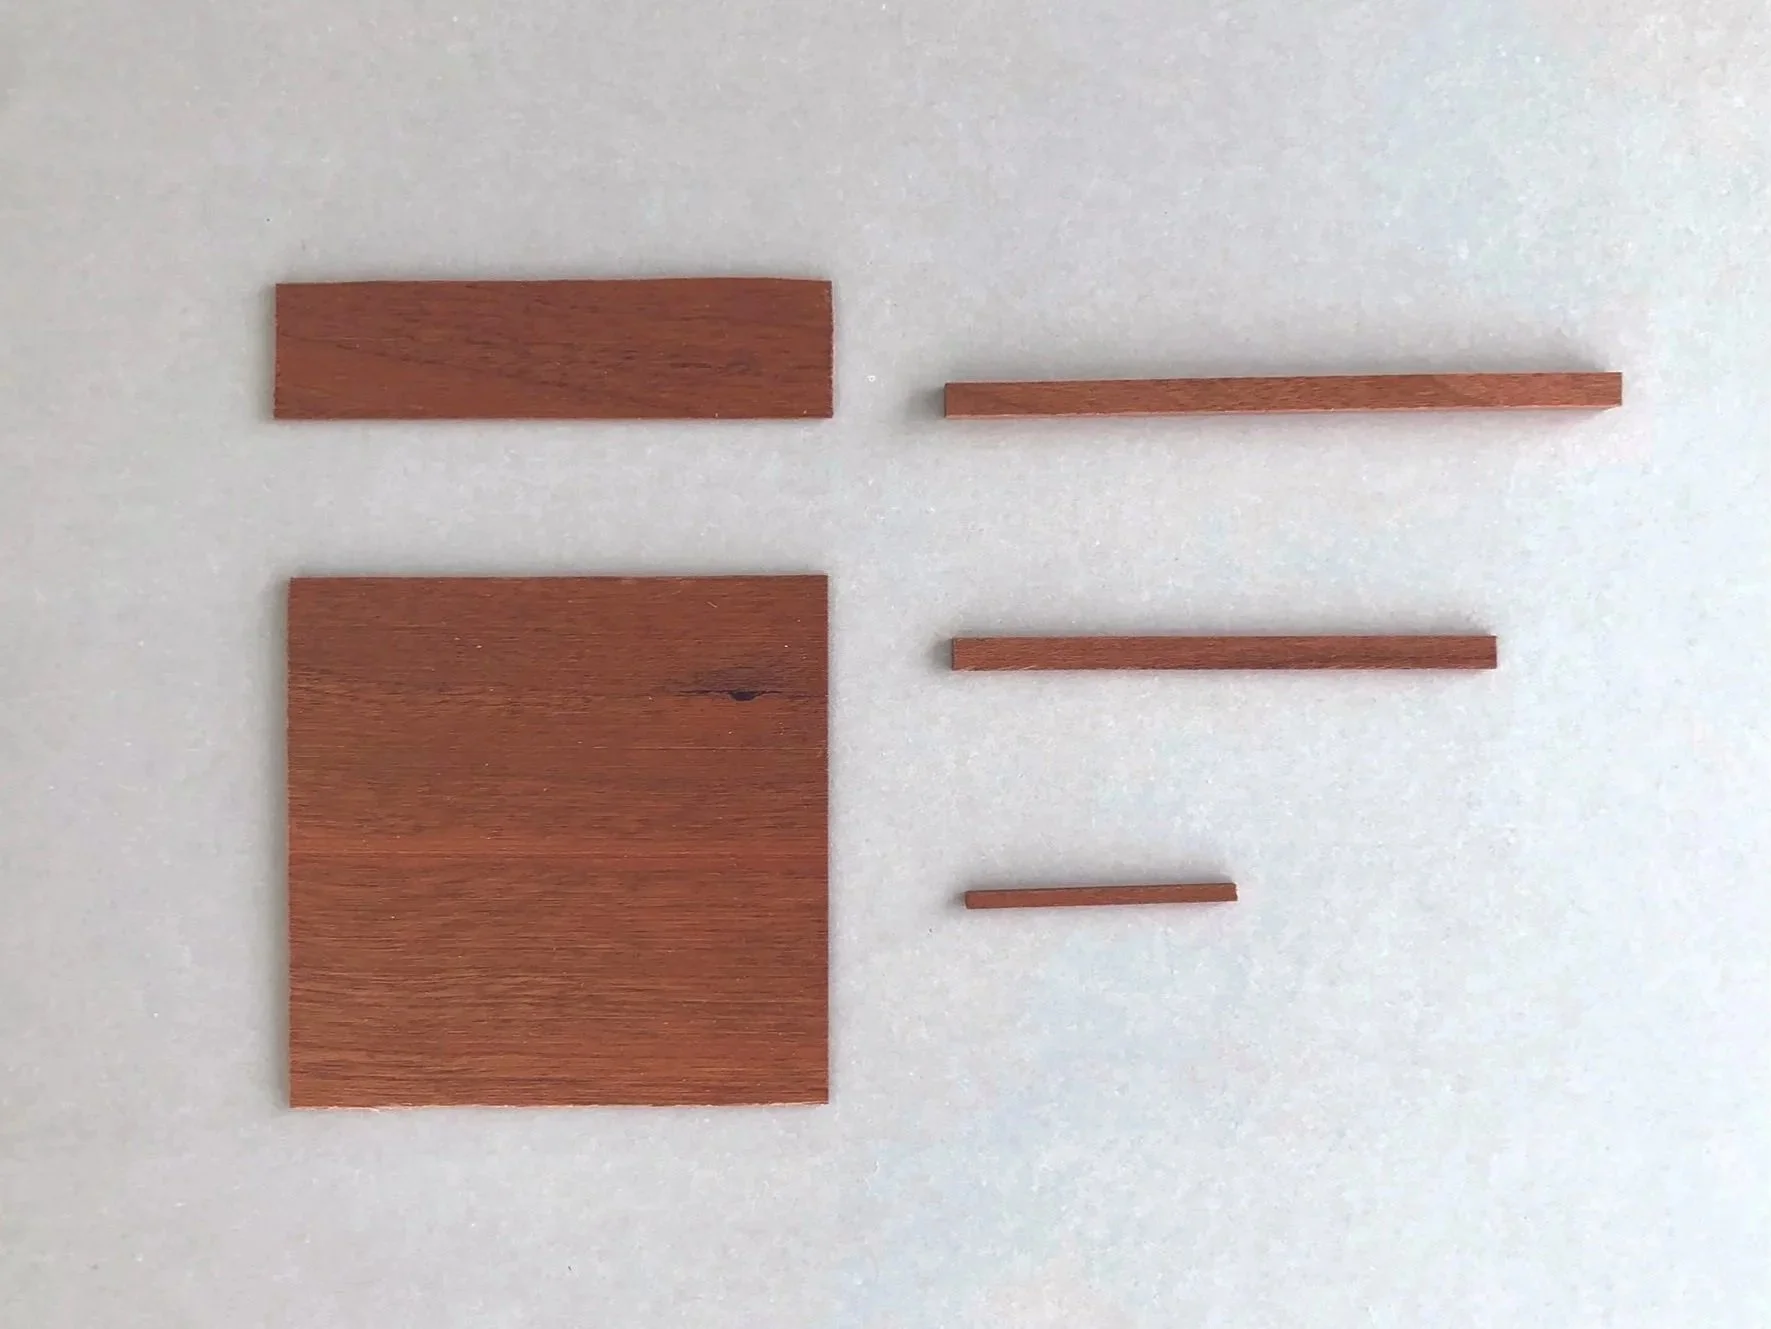
Materials:
Wood (see measurement chart)
RulerPencil
Craft knife
Cutting mat
Fine sandpaper or small file
Glue
Stain and/or finish (optional)
Steps:
Before cutting your wood, decide whether or not you want to apply any stains or finishes.Some finishes, however, may make it harder for the glue to adhere, so you should only pre-apply the finish to the faces that will not be glued. I applied lacquer to the spindles, horizontal slats, and base, but not to the legs.
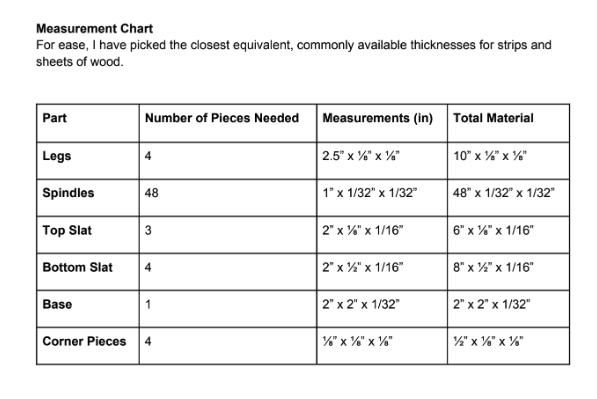
Cut all your wood to the sizes specified in the measurement chart. Precision is key in this design because a mismatch in the length of the spindles will make it difficult to alignthe other pieces of the arm/side of the chair. I sanded down many of the ends and edges to achieve as flat and perpendicular a surface as possible.
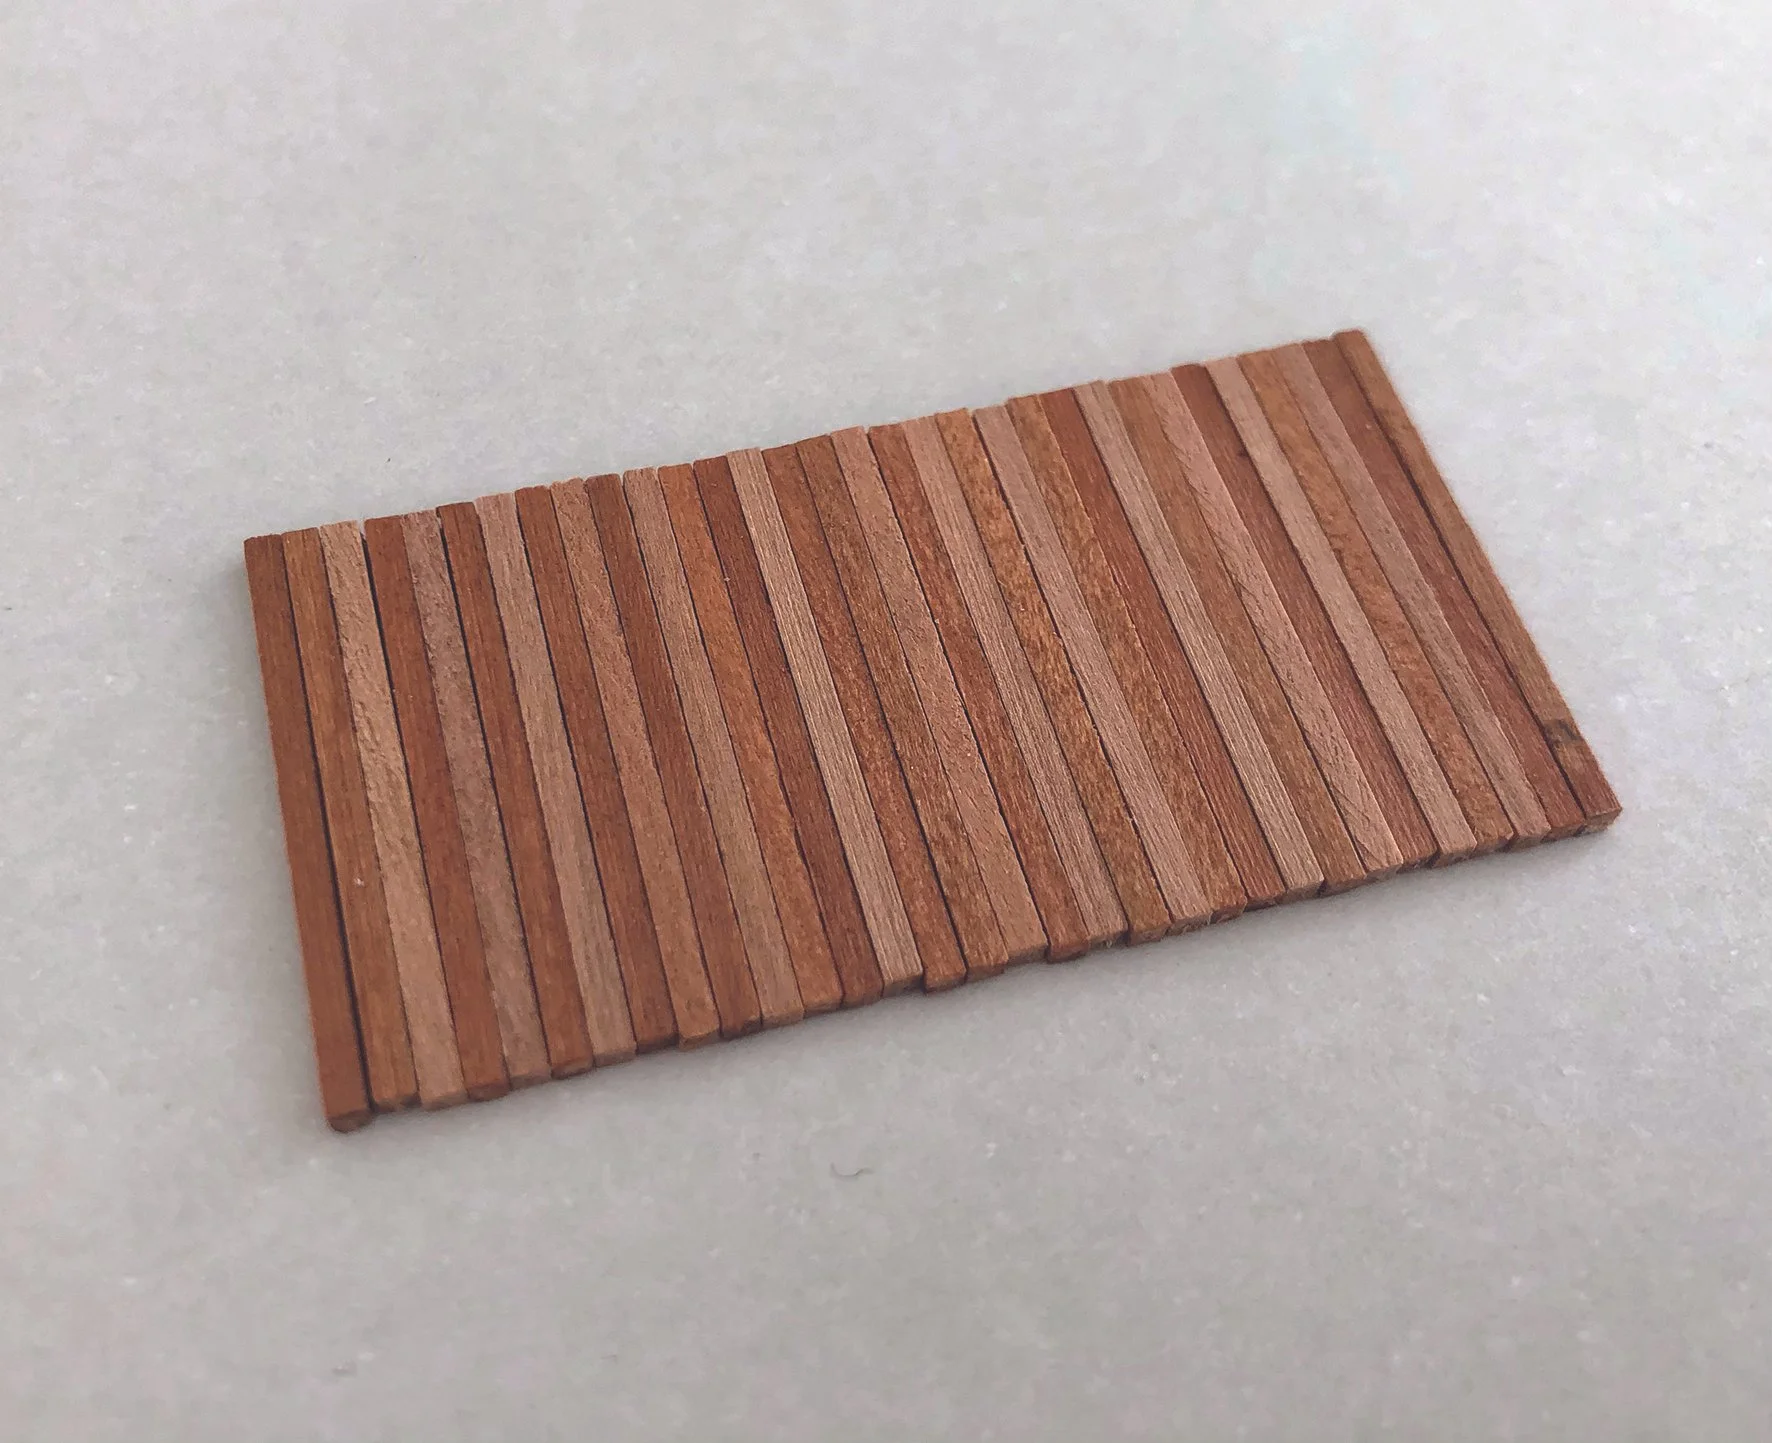
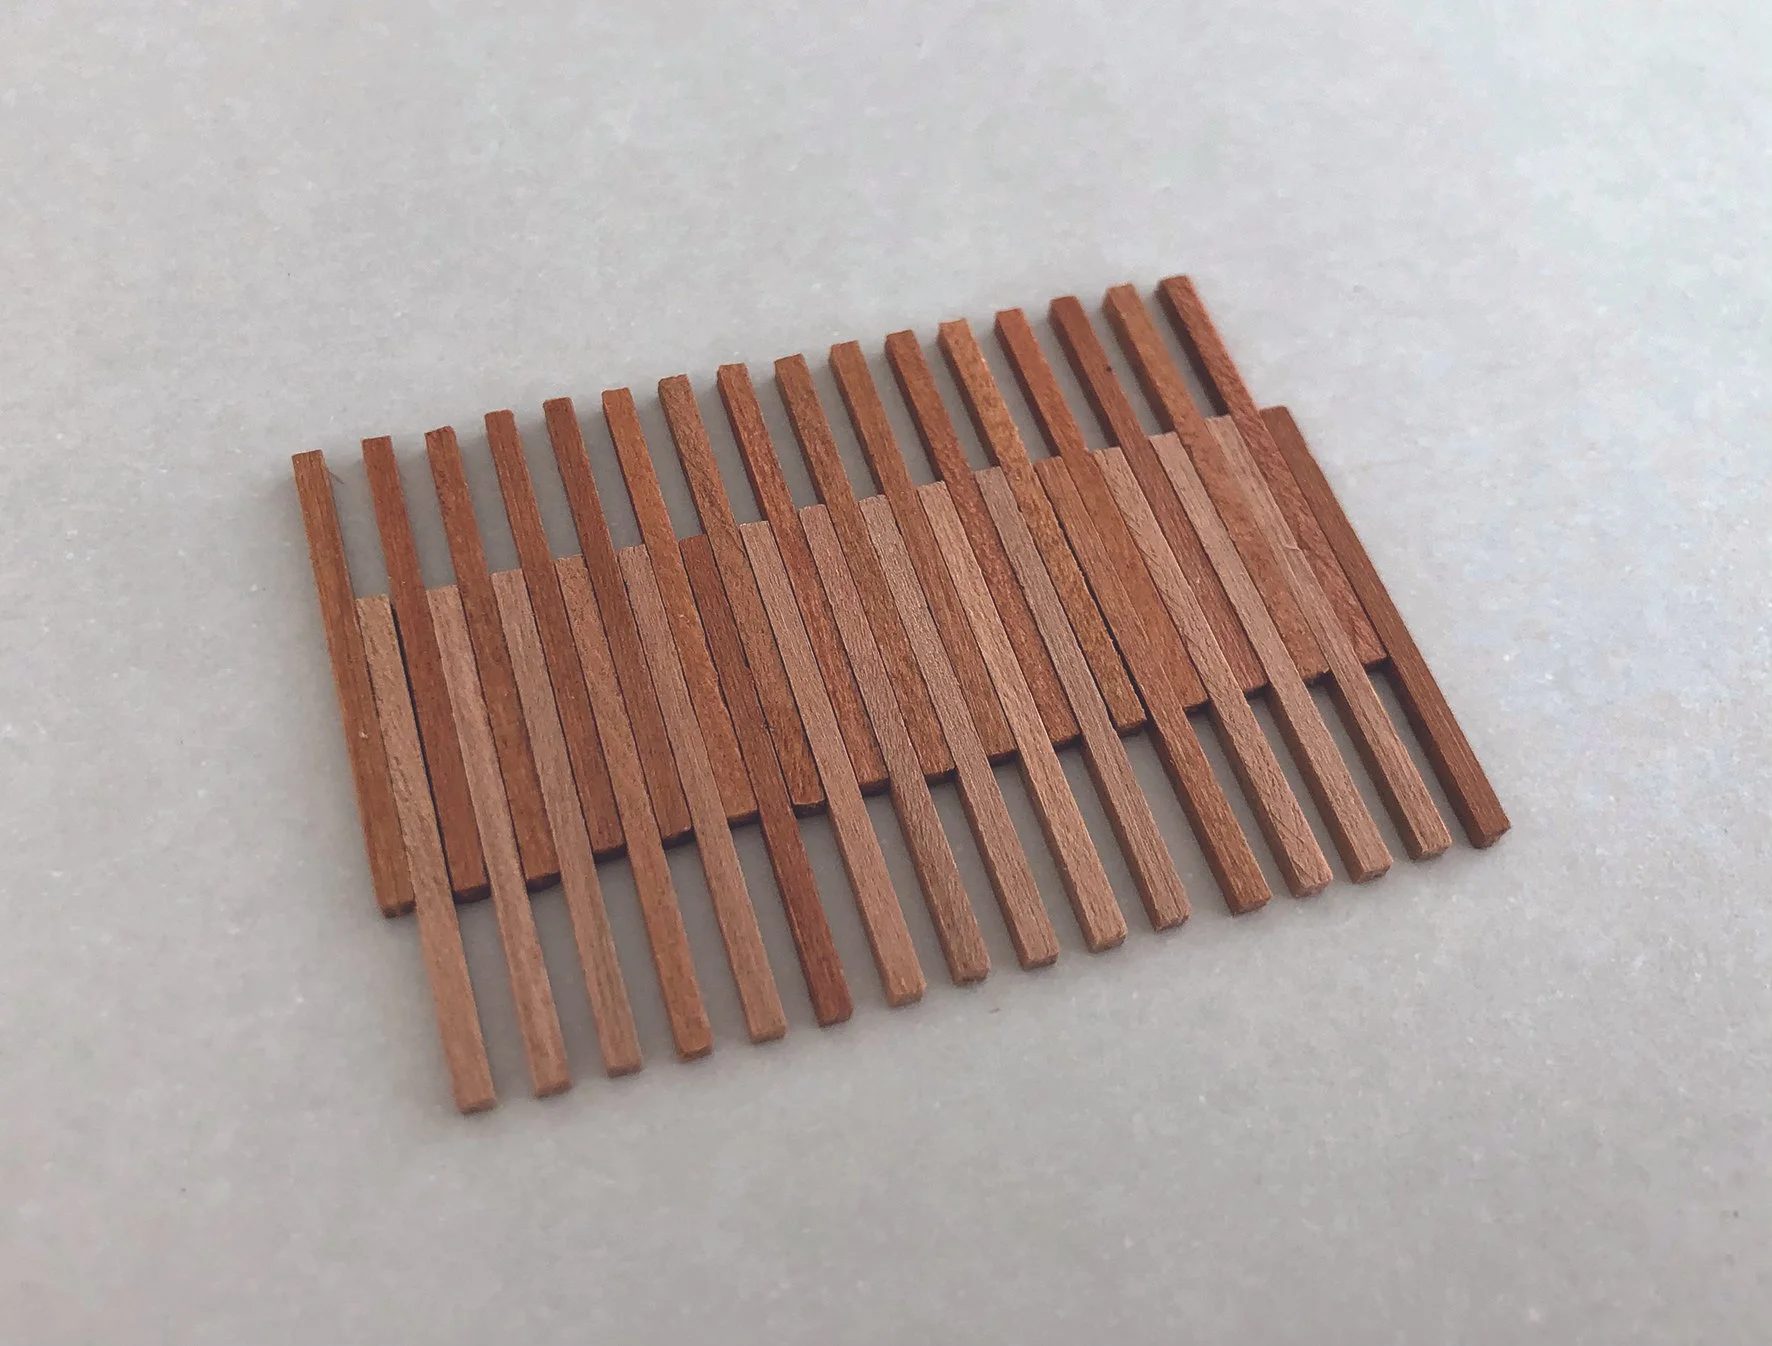
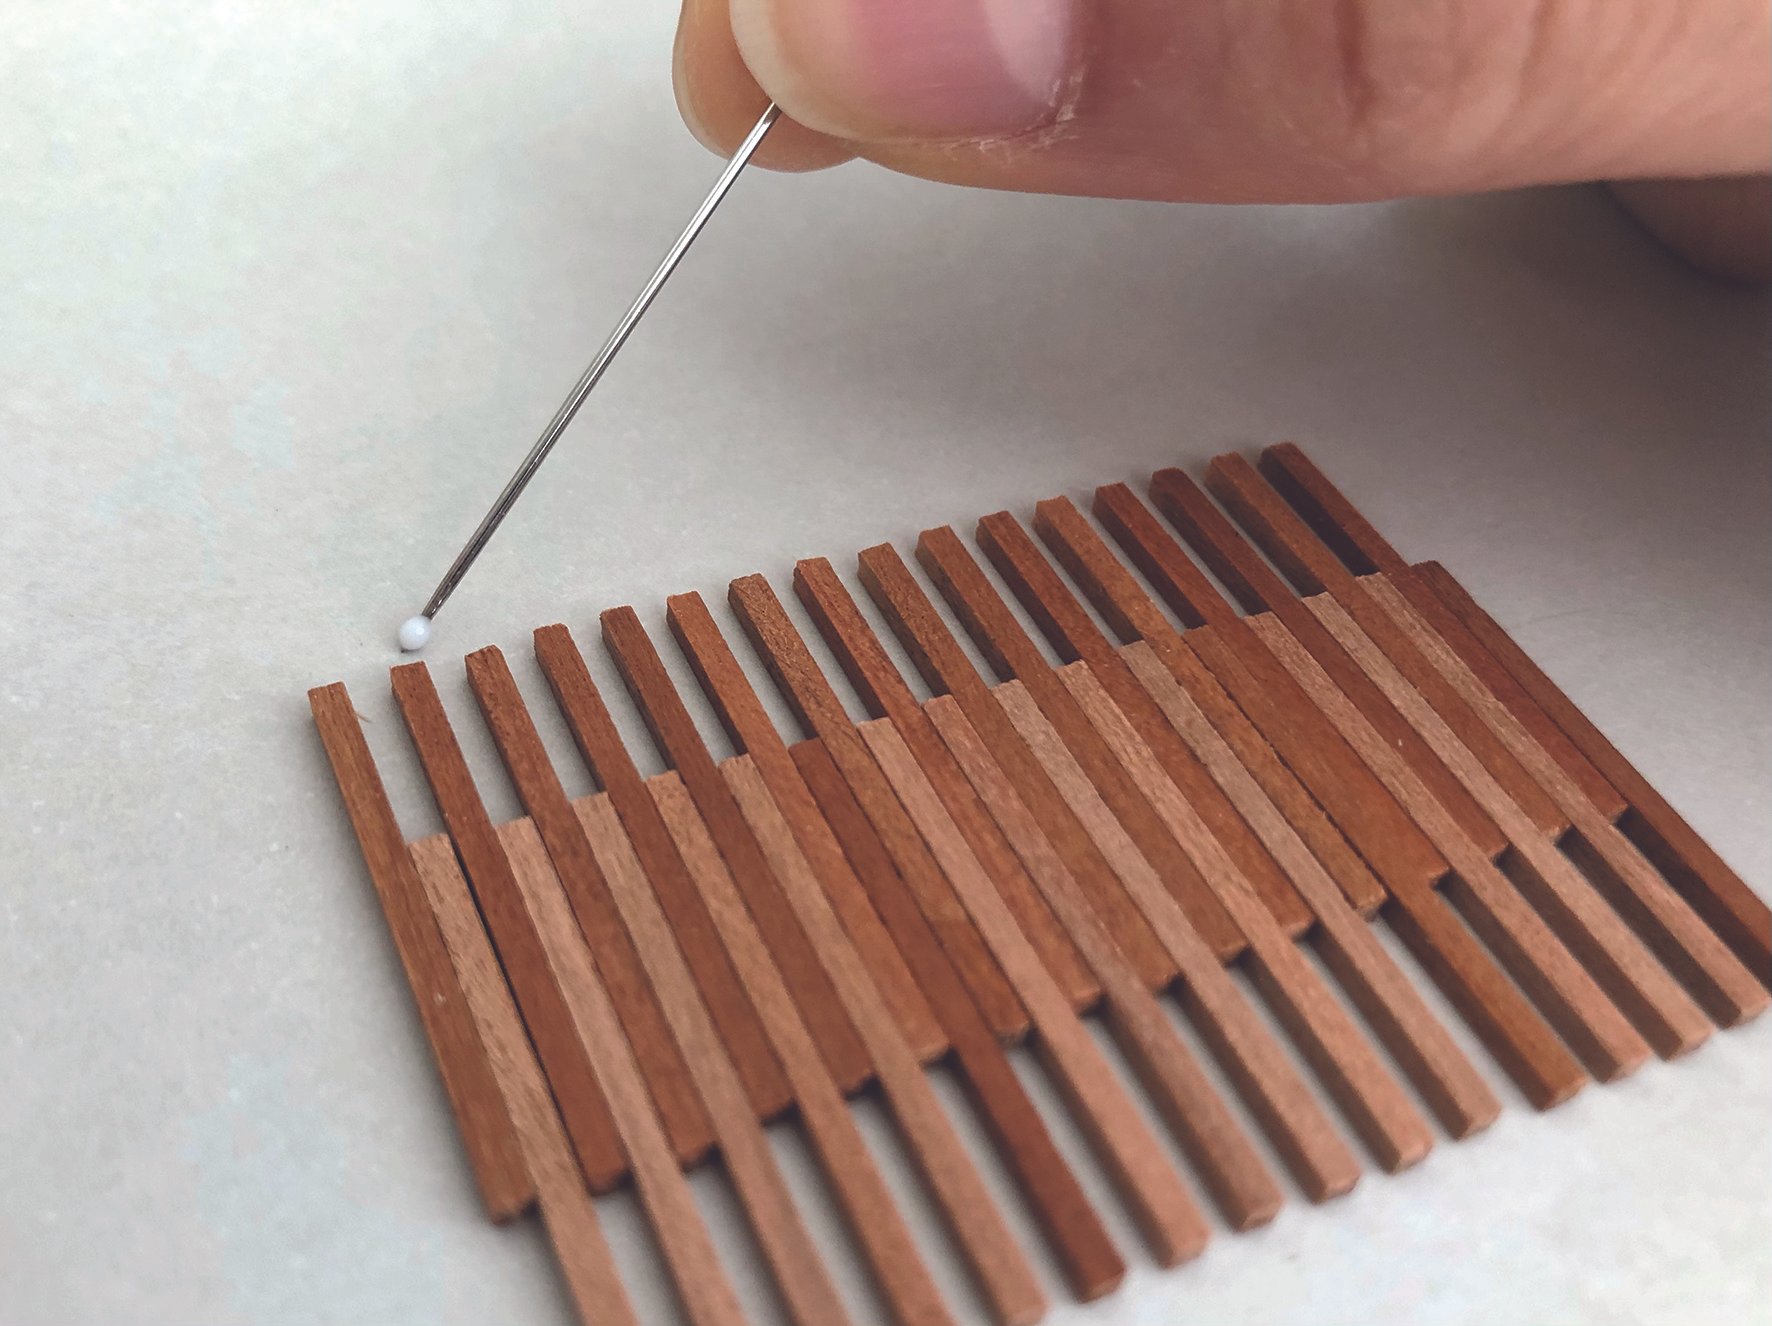
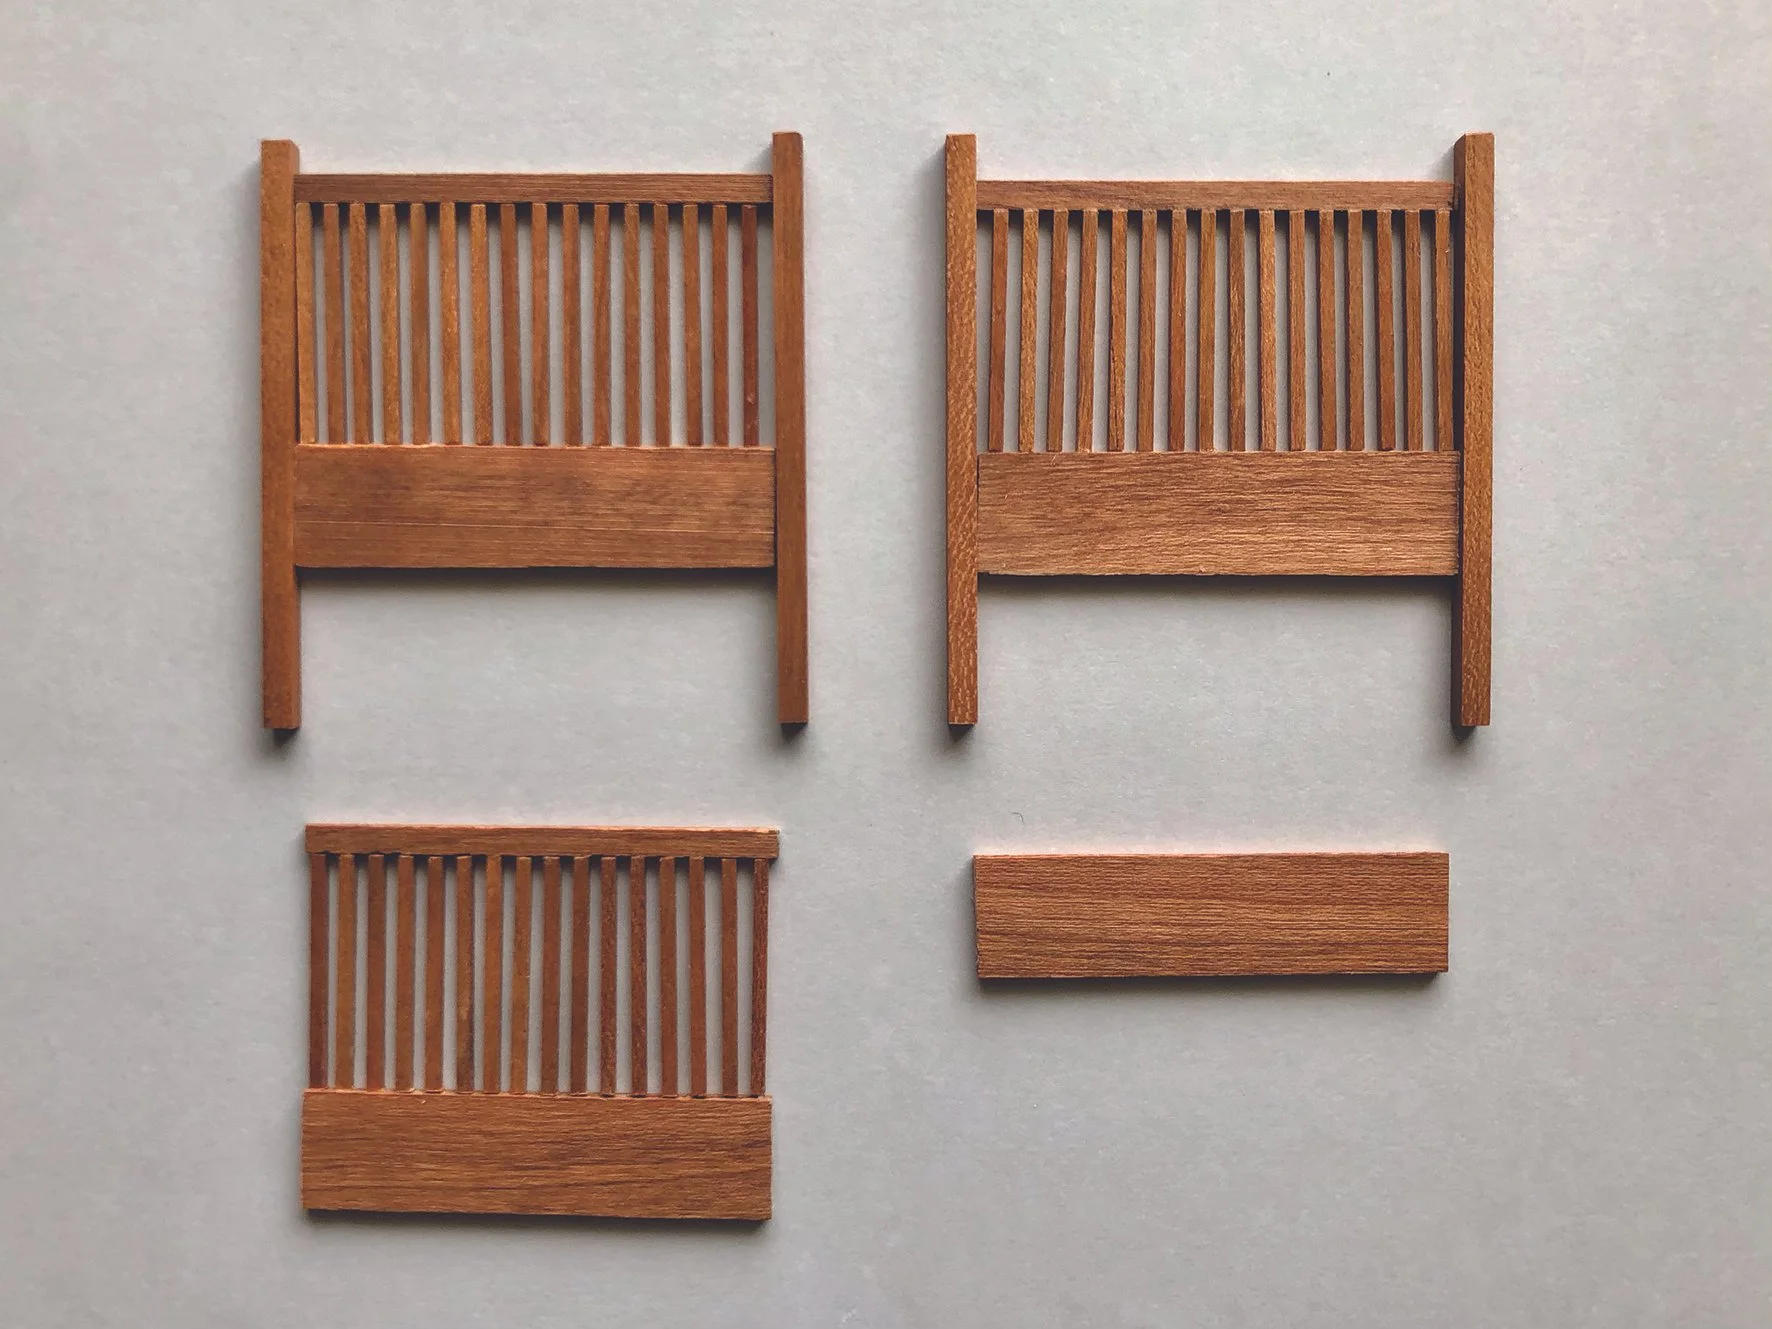
Layout 32 of the spindles, side by side, aligning the tops and bottoms. Do this on a smooth surface that would be easy to peel glue from. Next, carefully move the second spindle down, trying not to disrupt its neighbours. Do this for every other spindle. The 16 spindles that were not moved will form the side panel of the chair, while the 16 alternating spindles that were moved lower create even spacing.
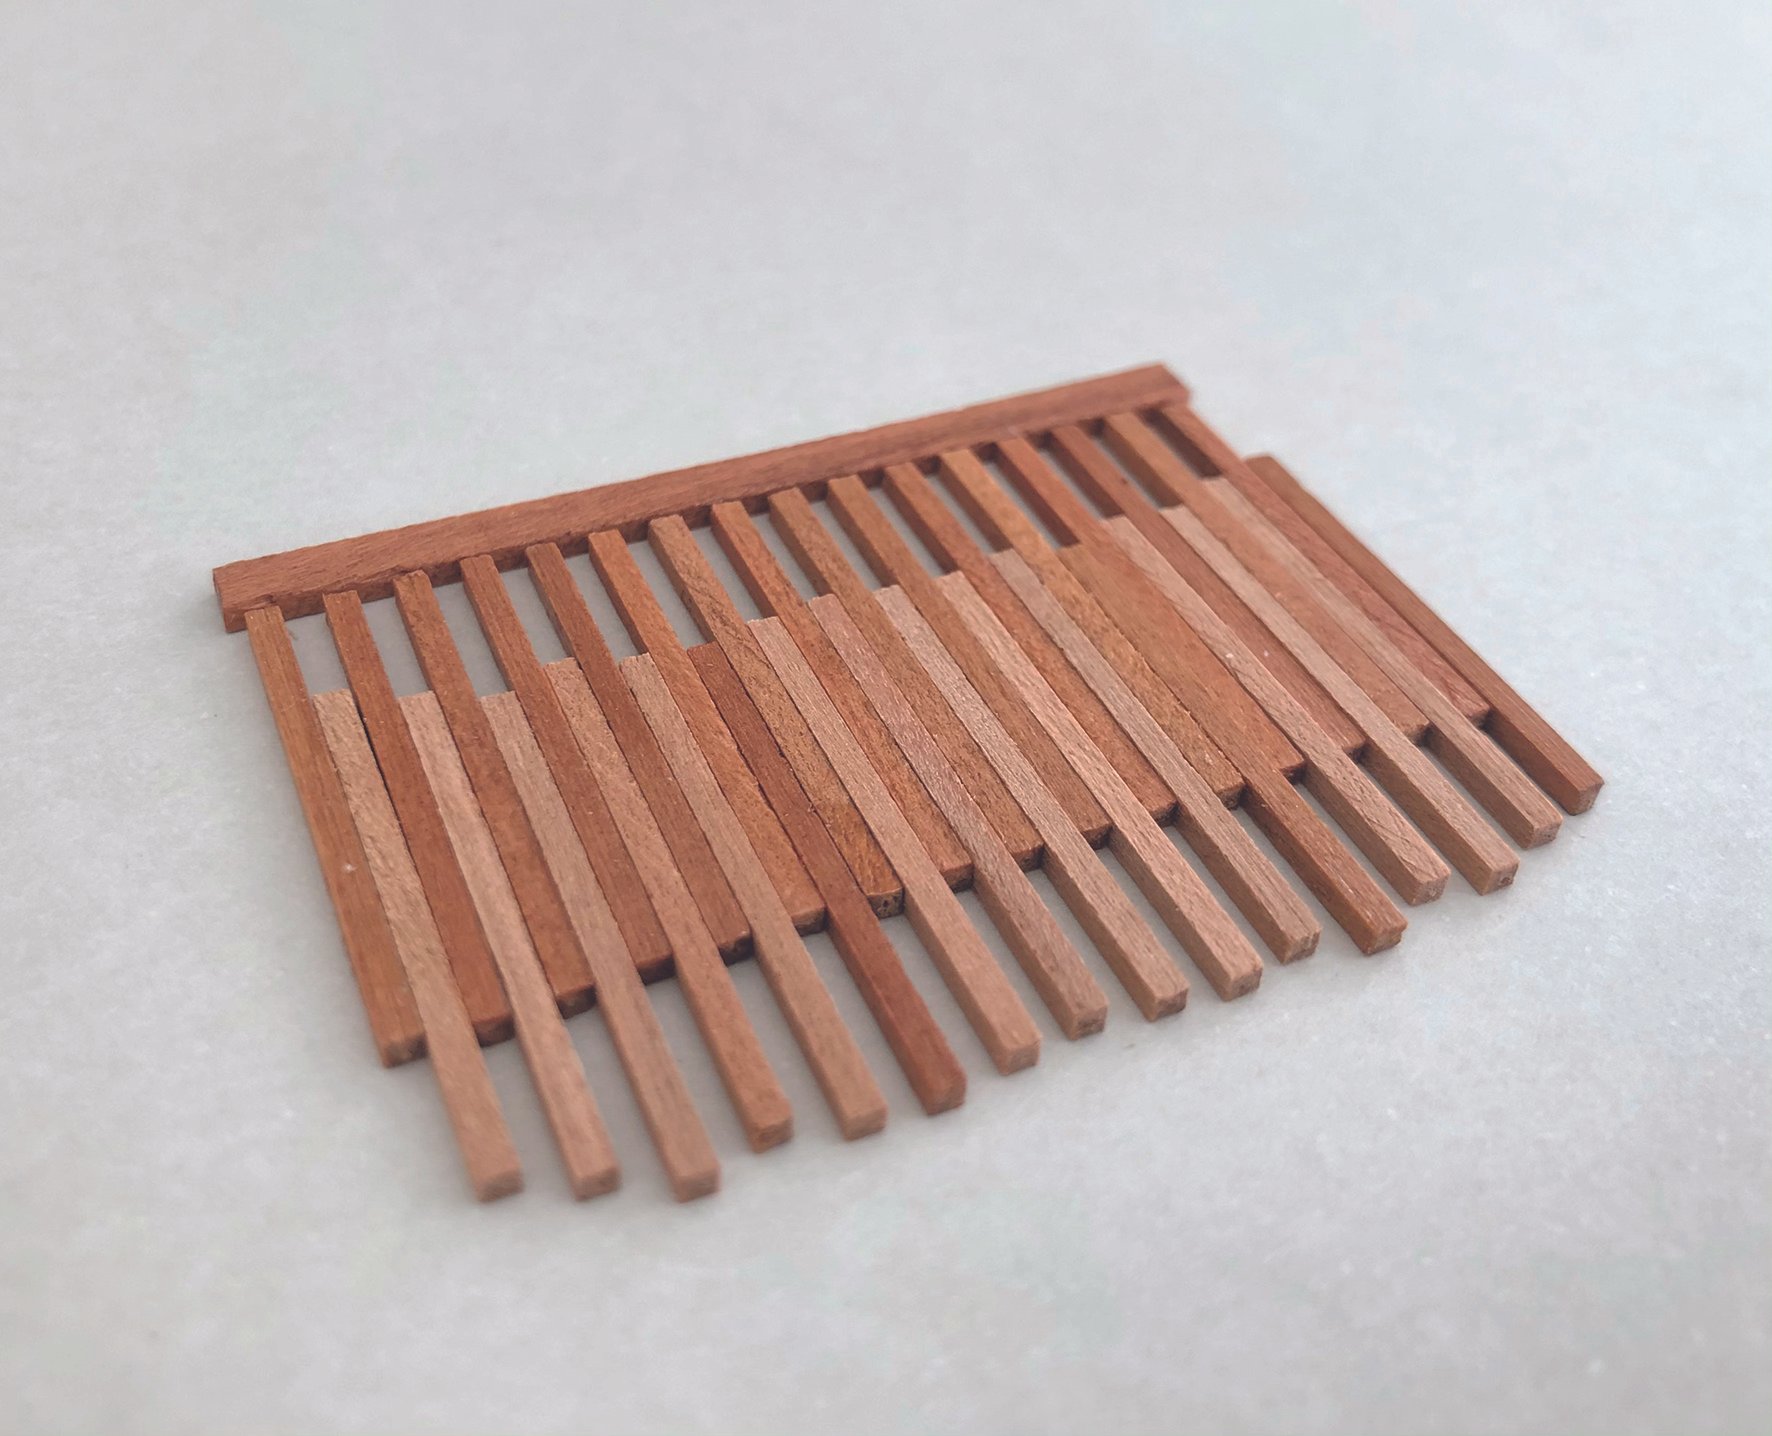
Carefully apply glue to the tops of the higher spindles. Press a top slat into the glued spindles, trying to keep it as centred and perpendicular as possible. Let your glue dry entirely.
To form another side panel, align the 16 unglued spindles to a straight edge. Apply glue to the bottom of the lower spindles and press another top slat into them. Make sure the slat is centred relative to the lower spindles! It will be slightly offset from the first top slat.Let your glue dry entirely! If you move them before the glue dries, you may ruin the alignment.
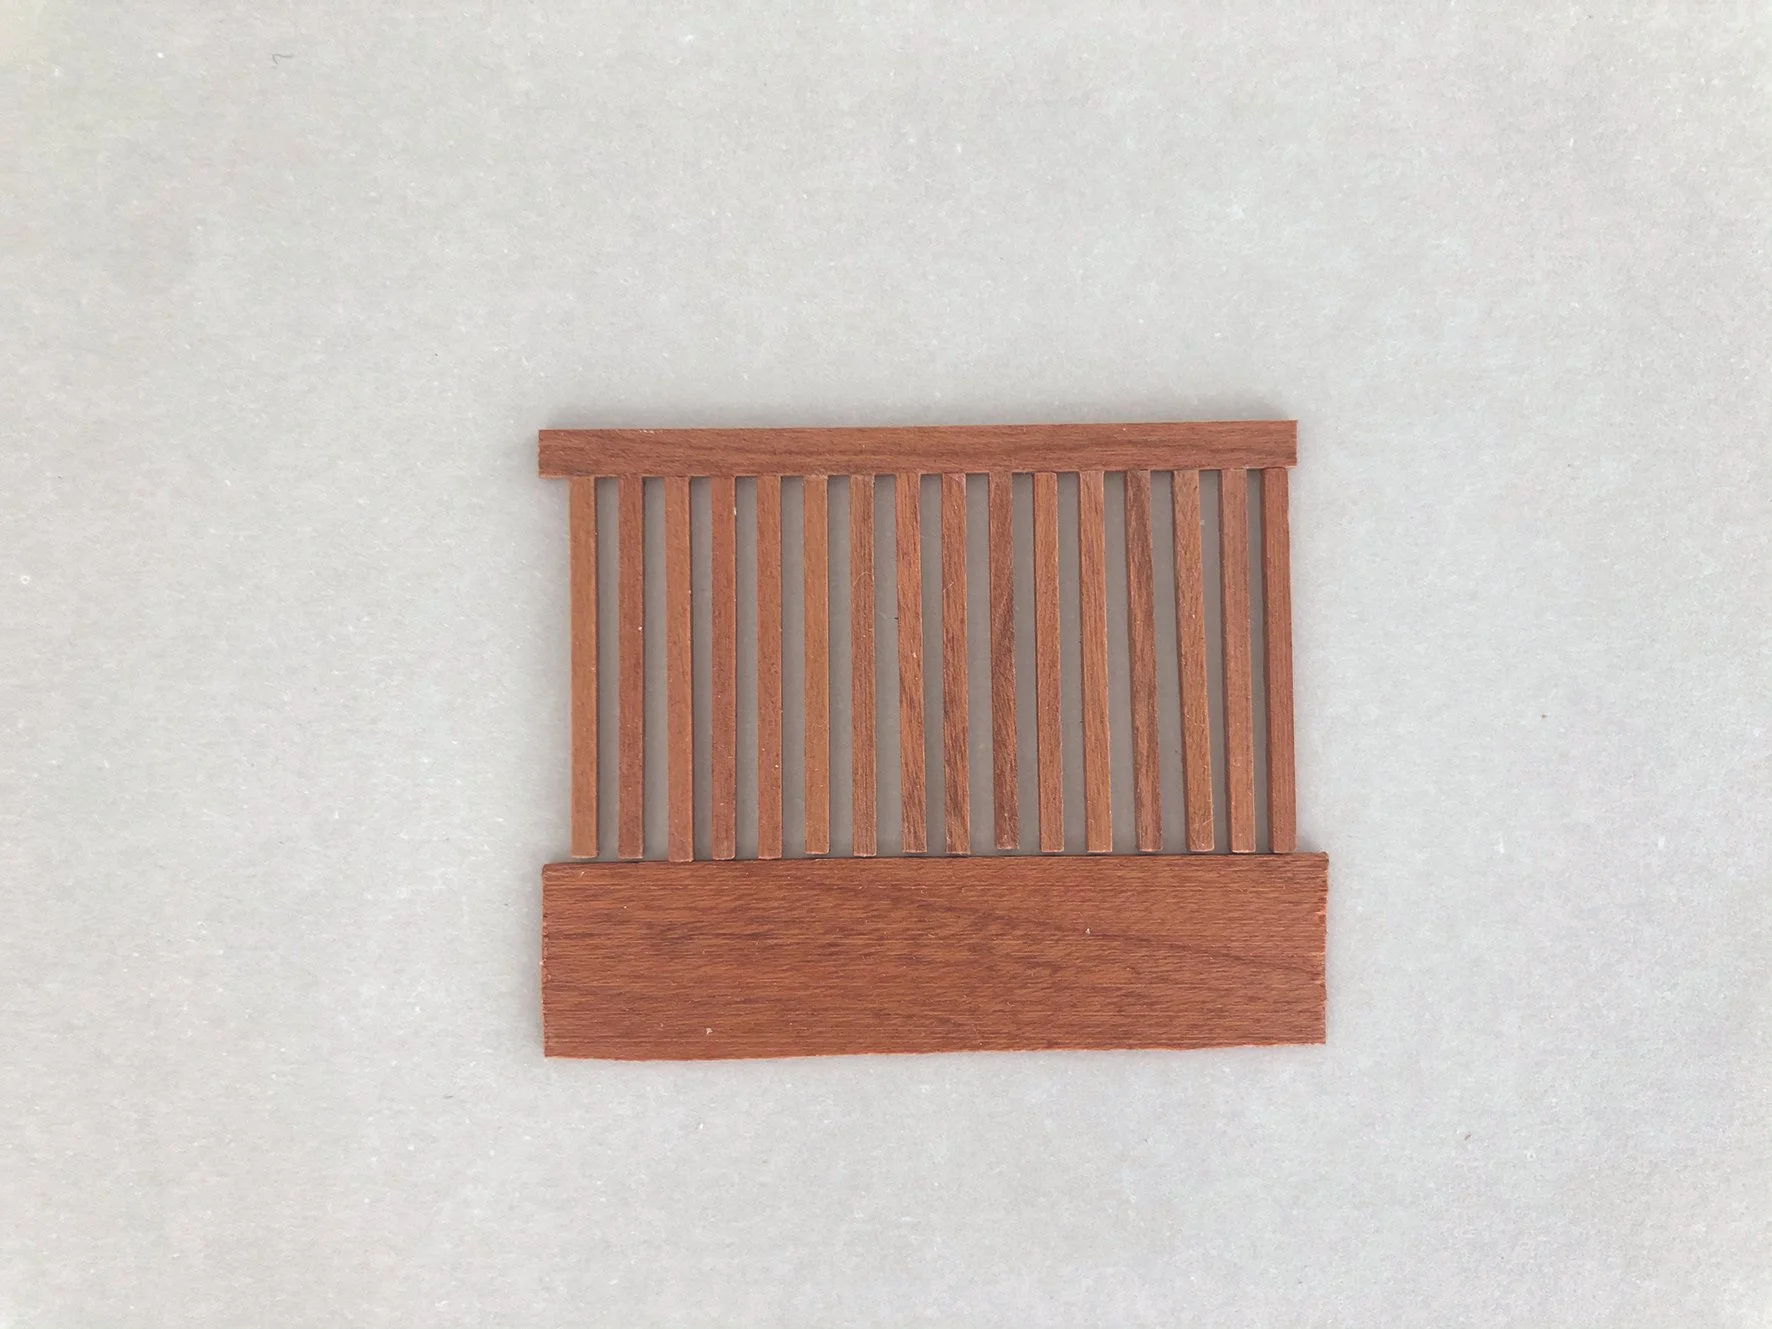
Carefully tease the two side panels apart. Take one of them and place the remaining spindles in between the glued spindles and repeat step 5. Again, carefully separate the two side panels when the glue is dry.
Apply glue to exposed ends of the spindles on one of the side panels and attach a bottom slat. Repeat with the other two sides.
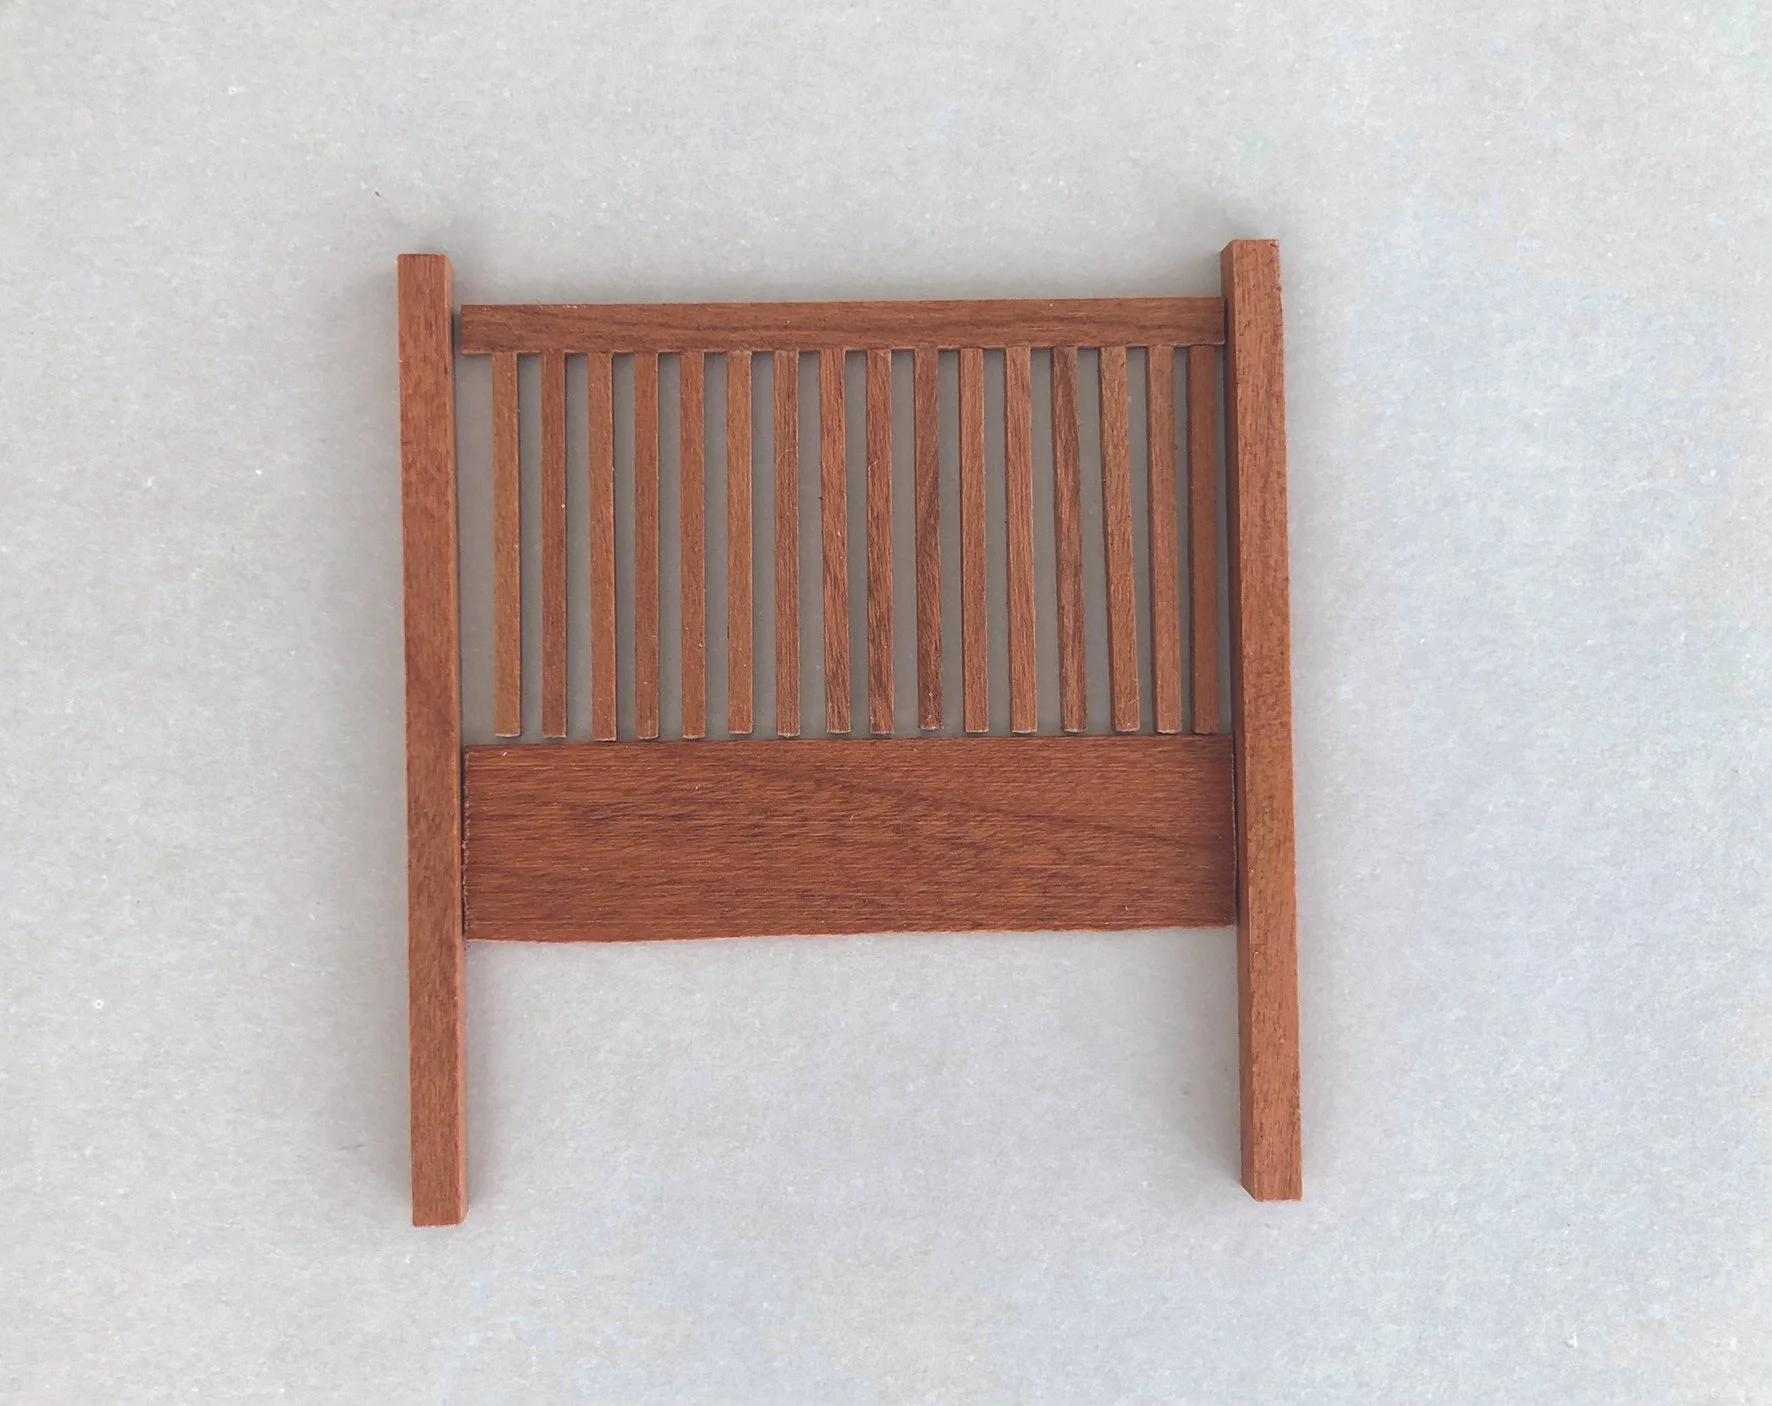
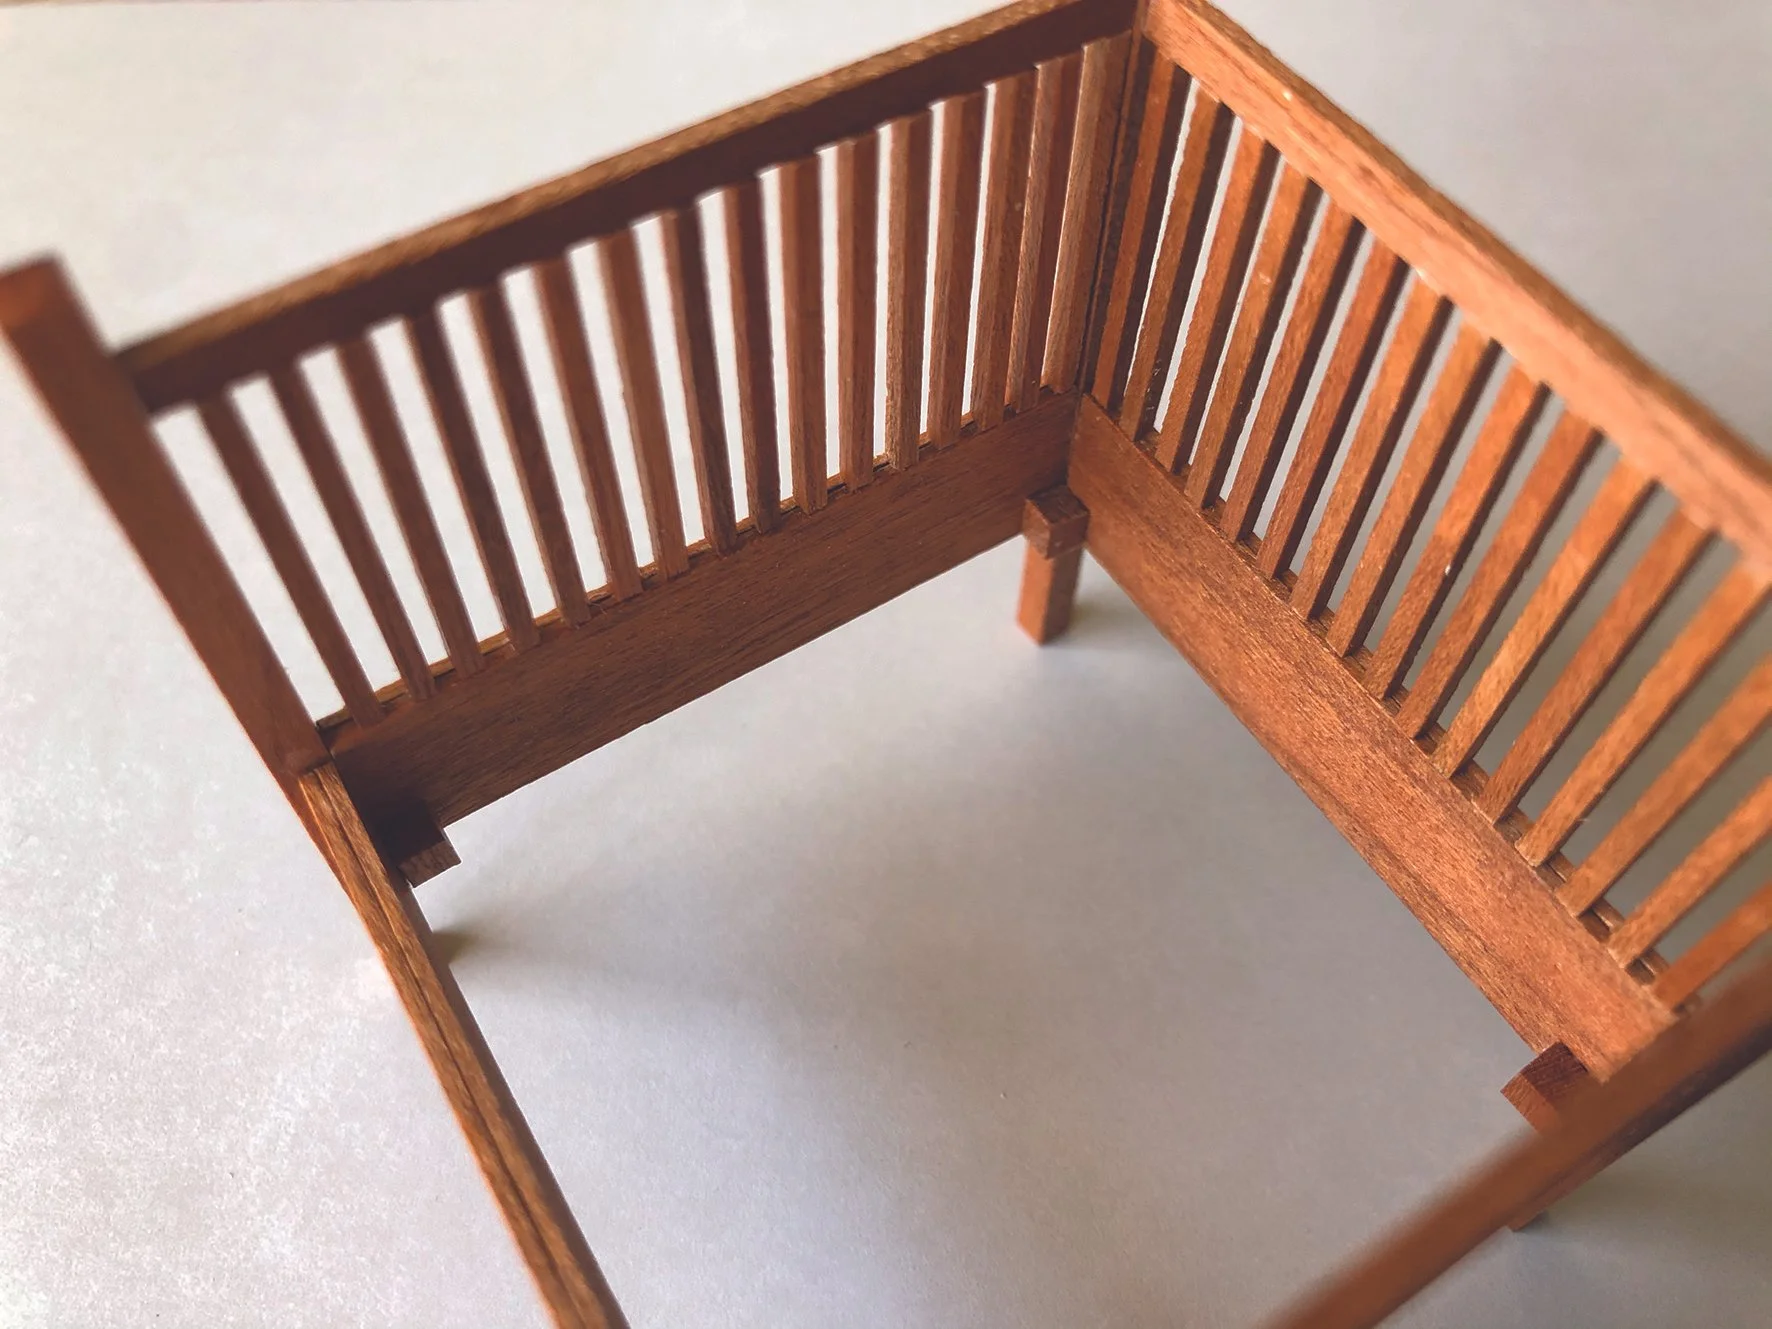
Take two of the side panels and glue a leg on the left and right, aligning the top of the side panel about one leg-width lower than the top of the leg. Let dry.
Glue the remaining side panel and the remaining bottom slat to the first two side panels in a square arrangement. Glue the 4 corner pieces on the inside corners of the bottom slats, aligned to the bottom edge.
(Optional) Apply any wood finish to any surfaces you missed earlier.
Glue the base piece on top of the corner pieces. You are done with the frame of the chair!
Extra optional step: To make cushions, you can form a square shape slightly smaller than the base of the chair with layers of cardboard or foam and wrap it in your choice of upholstery material (fabric, leather, etc)
Follow Valentina’s miniature creations on Instagram: @tetracerus
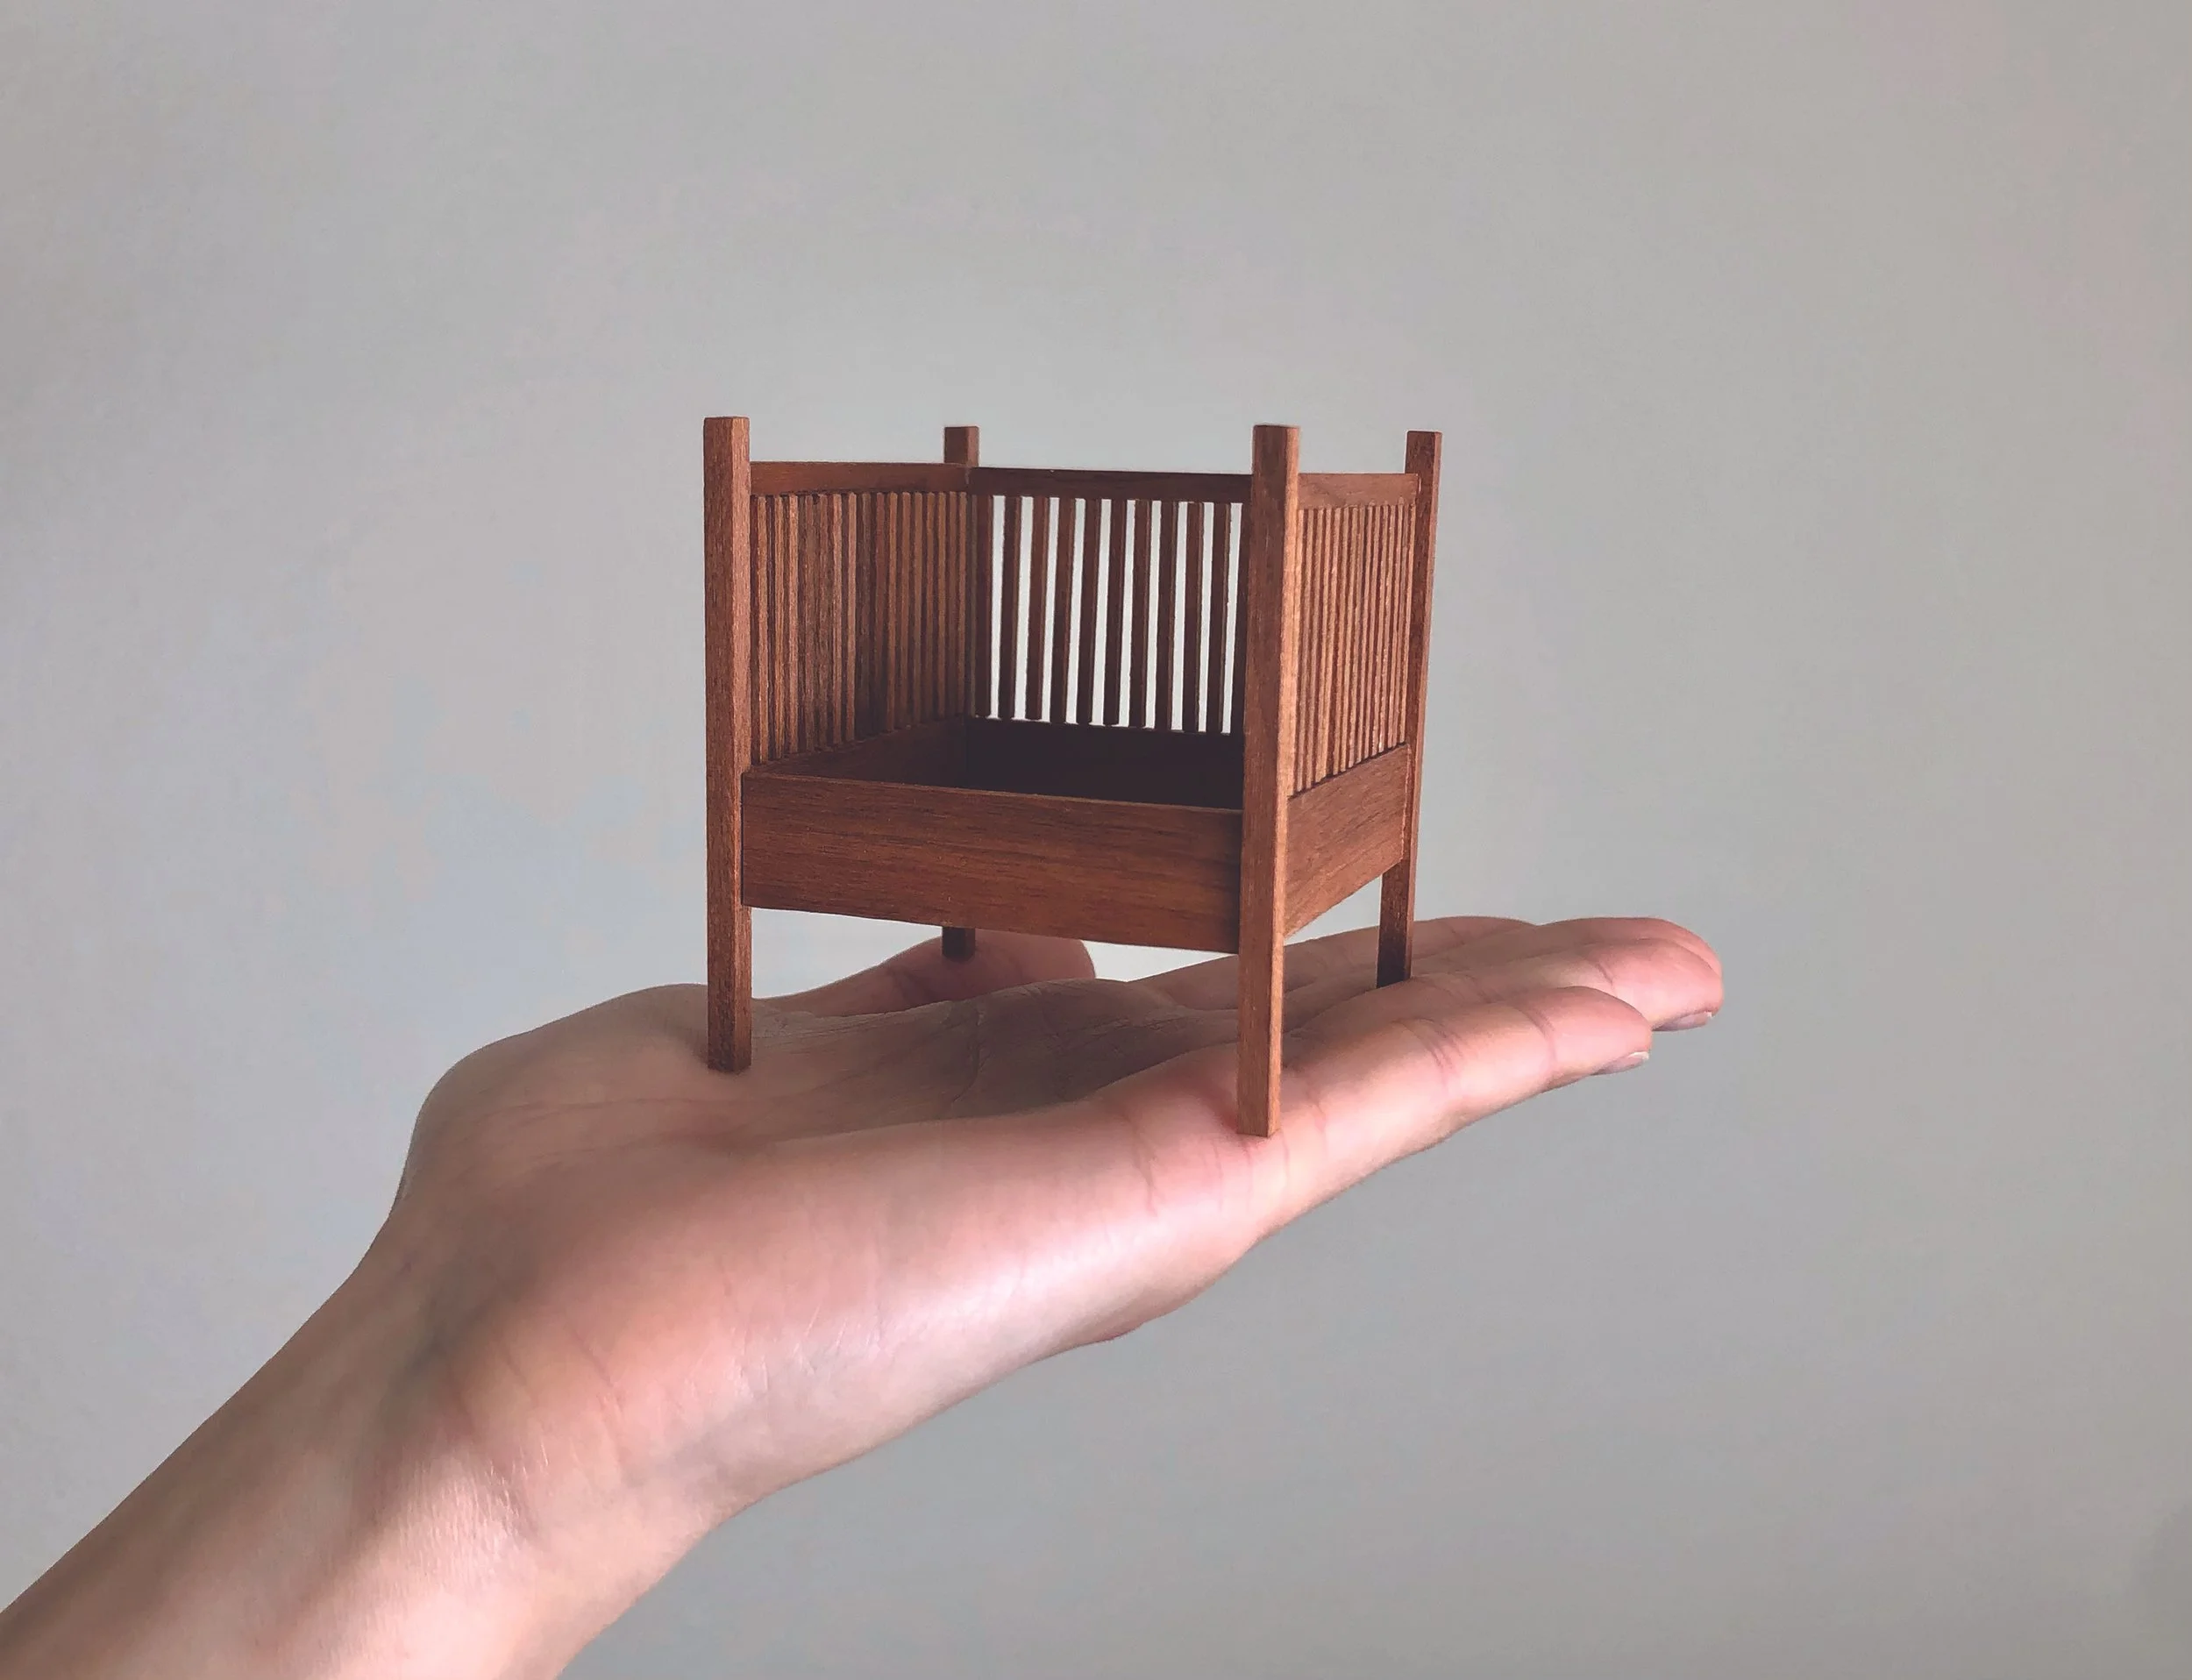
I chose cherrywood for its warm tone and historical accuracy, as most classical Stickley pieces are offered in oak and cherry. However, you can choose any wood you like.
The choice of stain and finish is also up to you. The furniture of the time was finished with shellac and paste wax, here I used a gloss clear lacquer by Model Master.
If you would like to make a less time-consuming or airier looking version, you can choose to use only 5 spindles per side panel, centred but spaced with the same technique.
